Making Arch from scratch to hacking ready.

Introduction
Practice makes perfect. What I will suggest is before installing arch directly on your the main system or doing dual boot do a good practice of installing arch in a virtual box. I will use VirtualBox for this tutorial because most of the users out there use vbox. And this is going to be an EFI installation and the steps will be pretty similar if you are doing it on the main machine just care about drivers install the proper one.
Warning: I am not Mr. Perfect so use the arch installation guide as a reference if you are stuck somewhere.
1. Downloading Utilities
For this tutorial you need Vbox. And base Archimage after that we are good to go.
2. Making A Arch VM.
First of all, we will make a new virtual machine. I think all of you guys know how to make a VM. And I’m going to give 20 Gigs of storage to this VM. Or If you are installing it on the main machine then skip this step and move on to the next one.
3. Create a Live USB.
After downloading the arch image you can create a live USB. Now the simplest way of creating it is using an application like Etcher. But if you want to look cool like 1337 stuff so you will go with CLI.
dd bs=4M if=/path/to/archlinux.iso of=/dev/sdx status=progress && sync
You are good to go now just put the Pendrive in and brrr.
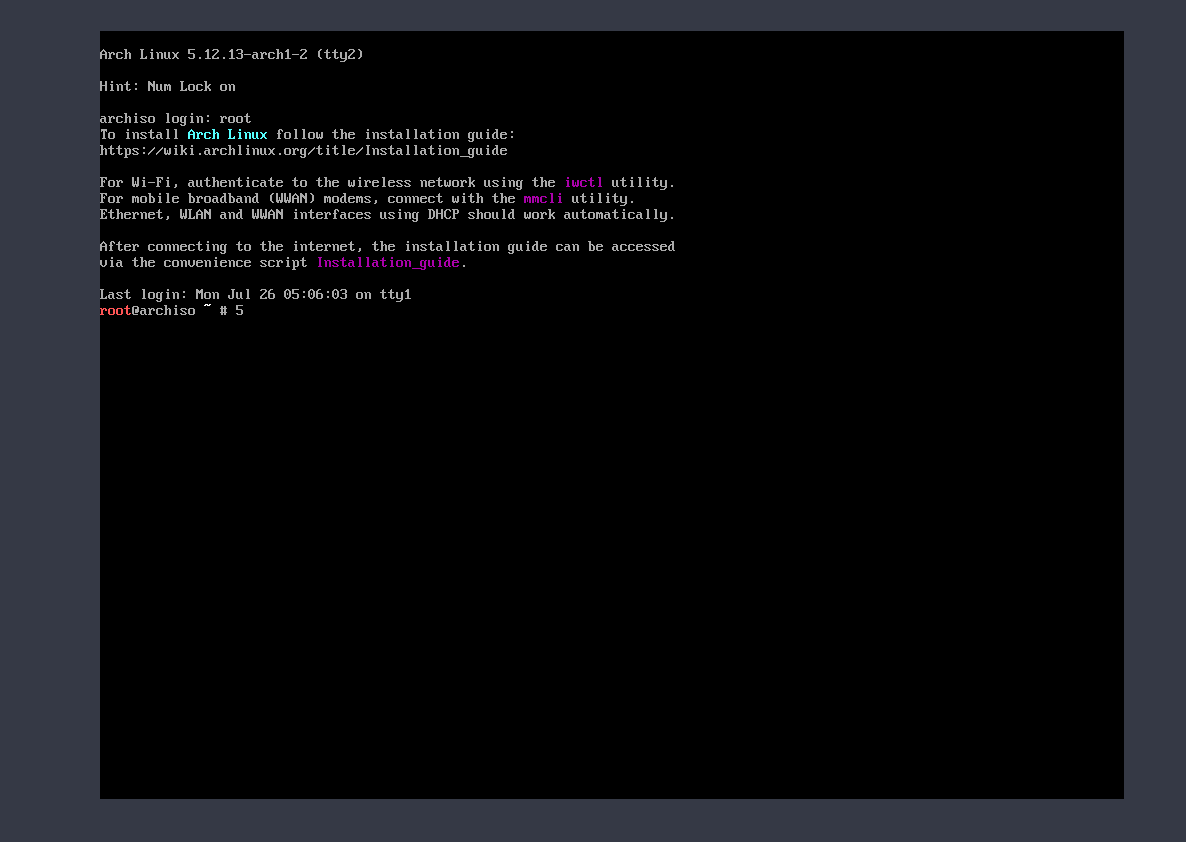
4. Boot your machine.
Power on the VM. If you get a screen like this then kudos.
5. Set the Keyboard Layout.
So by default, the keymap is set to the US but in case you want to change it what you can do
ls /usr/share/kbd/keymaps/**/*.map.gz
and if you want to change the layout then you have to use loadkeys command. Suppose you need to change to german then you would run:
loadkeys de-latin1
Internet Connection
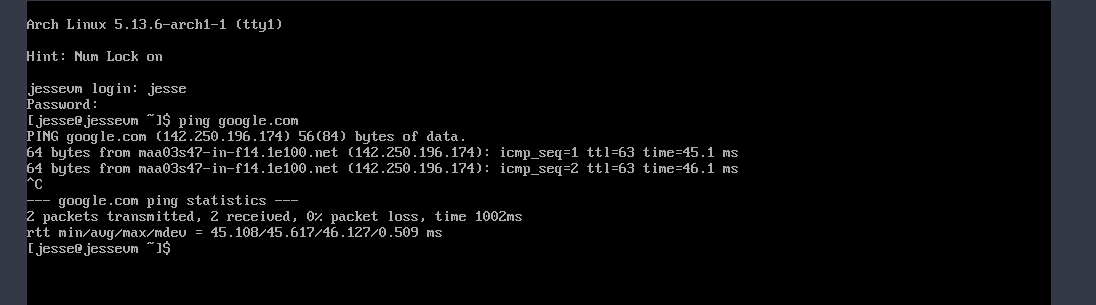
So, first of all, we need to check that we having a working internet connection. Otherwise, this installation is useless, So to check the connection we will run ping command.
ping -c3 google.com
And results will be something like
PING google.com (142.250.196.174) 56(84) bytes of data.
64 bytes from maa03s47-in-f14.1e100.net (142.250.196.174): icmp_seq=1 ttl=118 time=50.7 ms
64 bytes from maa03s47-in-f14.1e100.net (142.250.196.174): icmp_seq=2 ttl=118 time=53.5 ms
64 bytes from maa03s47-in-f14.1e100.net (142.250.196.174): icmp_seq=3 ttl=118 time=52.1 ms

--- google.com ping statistics ---
3 packets transmitted, 3 received, 0% packet loss, time 2003ms
rtt min/avg/max/mdev = 50.726/52.093/53.481/1.124 ms
And if you get your ping successful then kudos otherwise you may need to check the arch wiki network configuration section
Time-Synchronization
Now we need to enable NTP(Network Time Protocol) that helps synchronize time via Internet. So you need to run the timedatectl command.
timedatectl set-ntp true
So we need to verify right? now you can do two things run simply timedatectl or timedatectl status I will run status one because that looks more professional.
timedatectl status
And in result there will be a bar called ntp : active if everything goes right then ntp will be active otherwise it will be inactive.
Disk Partitioning
Now, this is a bit critical stuff you need to be a little bit careful because you can mess some stuff here but arch wiki got our back here too.
So I will use fdisk to partition the disk because it’s recommended in arch wiki. Let’s start
fdisk -l
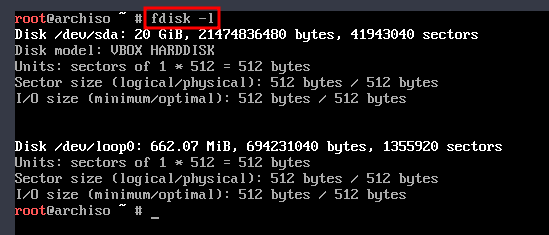
And this will list all of the drives to use as you can see there are two drives listed you thinking why there are two drives we have only created one? because the second device is just the loopback device. Now, what is a loopback device in a nutshell A loopback device in Linux is a virtual device that can be used like any other media device. If you want to read more about loopback device consider reading the man page but our device is the 20 gigs one /dev/sda.
So now let’s move forward run:
fdisk /dev/sda
then we will get the fdisk prompt. You can type m for help.
- First of all, we need to create a new label, We are doing a EFI installation so we need to make a gpt label you can type g.
Now we need to create a new partition press n to create a new partition. Now it will ask us partition number we will go with the default 1. Now it will ask what is the first sector we will go with default 2048. Now it’s asking the last sector we will give here 550m for that use +550m. Because this is going to be our EFI partition and it needs to be 550mib and finally it will creat a Linux File system partition but that is not the correct FS(file system) we will change it soon.

It’s going to look like this.
- We need three partitions. So let’s make the second one. The first one is EFI partition now we will create a swap partition.
Same steps:
- Press n.
- First Sector press enter and leave it as default.
- In the Last Sector we are creating a swap so we will give it 2 gigs use +2G and press enter.
- It created a new partition but it also created it as a Linux Filesystem that is not correct.

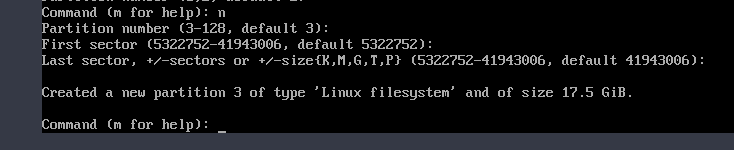
- Now the 3rd and last partition. Now we need to create the LFS.
Same steps:
- Press n.
- First Sector press enter and leave it as default.
- Last Sector press enter and it gives the rest of space to this partition.
- It created a new partition but this time it’s in the correct format Linux Filesystem.
Changing the Partition Type
So for changing the Partition type in fdisk:
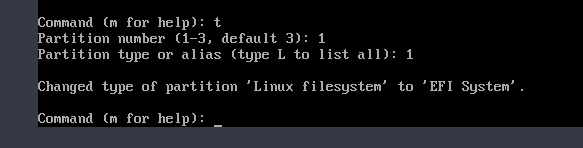
- Changing the First partition from LFS to EFI. Steps:
- Press t.
- Press 1 -> it’s asking which partition we need to change the type of we will start with 1st one.
- Press 1 to select the EFI System.You can press L to list all the aliases.
- Kudos it changed from LFS to EFI.
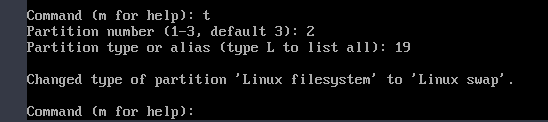
- Changing the Second partition from LFS to Swap. Steps:
- Press t.
- Press 2 -> it’s asking which partition we need to change the type of we will start with 1st one.
- Press 19 to select the Swap System.
- Kudos it changed from LFS to Swap.
Now we don’t need to change the last one because that is the LFS.
Writing The Table to the disk.
For writing the table to the disk you need to type w.
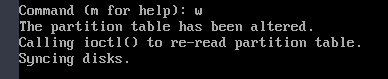
And it automatically exits out of fdisk.
Creating the FileSystem.
We need to make three different filesystems on that three diffrent partitions we have made.
- EFI Partition
So we need to make EFI partition Fat32. We will run:
mkfs.fat -F32 /dev/sda1

- Swap Partition
So we will create the new file system for swap partition using mkswap.
mkswap /dev/sda2
But there is one more thing we have to do to activate the swap filesystem we need to run swapon.
swapon /dev/sda2

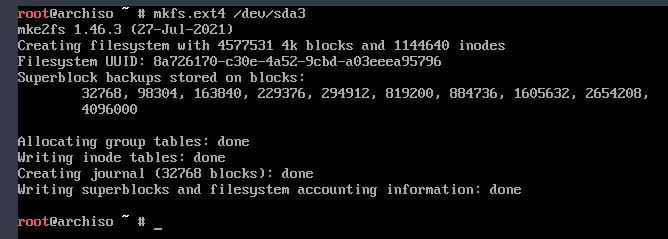
- Ext4 Filesystem
We need to use mkfs.ext4 command to create the big filesystem the last one.
mkfs.ext4 /dev/sda3
Yay! We have made our filesystems now we need to mount the big boy(our big filesystem)
Mounting the File System
To mount we need to run mount command on /dev/sda3.
mount /dev/sda3 /mnt

Installing Base Arch Linux(Big day)
We will use pacstrap command which will install the base system for the arch.
pacstrap /mnt base linux linux-firmware

we installing base(base arch linux you can say), linux(kernel) and linux-firmware(Linux firmware is a package distributed alongside the Linux kernel that contains firmware binary blobs necessary for partial or full functionality of certain hardware devices)
This will take some time.
KUDOS YOU HAVE SUCCESSFULLY INSTALLED THE BASE ARCH
CONFIGURING THE ARCH
Once you have installed arch successfully you need to configure it.
- Generating Fstab(File system table)
Linux system’s filesystem table, aka fstab , is a configuration table designed to ease the burden of mounting and unmounting file systems to a machine.
Generating a fstab file by genfstab command:
genfstab -U /mnt >> /mnt/etc/fstab

This should be enough to generate the fstab file.
Using Arch-chroot to Enter the newly Mounted disk as root. Run
arch-chroot /mnt
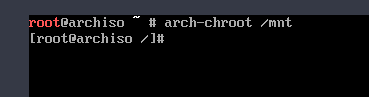
- You can see the prompt is changed.
- Now we are into sda3 partition and here we are installing sda3.
Setting the Time Zone
To set the time zone you need to run.
ln -sf /usr/share/zoneinfo/REGION/CITY /etc/localtime
- ln -> for linking
- -sf -> flags of ln(s for making symbolic links instead of hard links and f for force remove existing destination files)
- REGION -> Your Region
- City -> Your city
Setting our system clock
Now we have to set out a hardware clock for that run:
hwclock --systohc
Setting up the Locale
A locale is a set of environmental variables that defines the language, country, and character encoding settings.
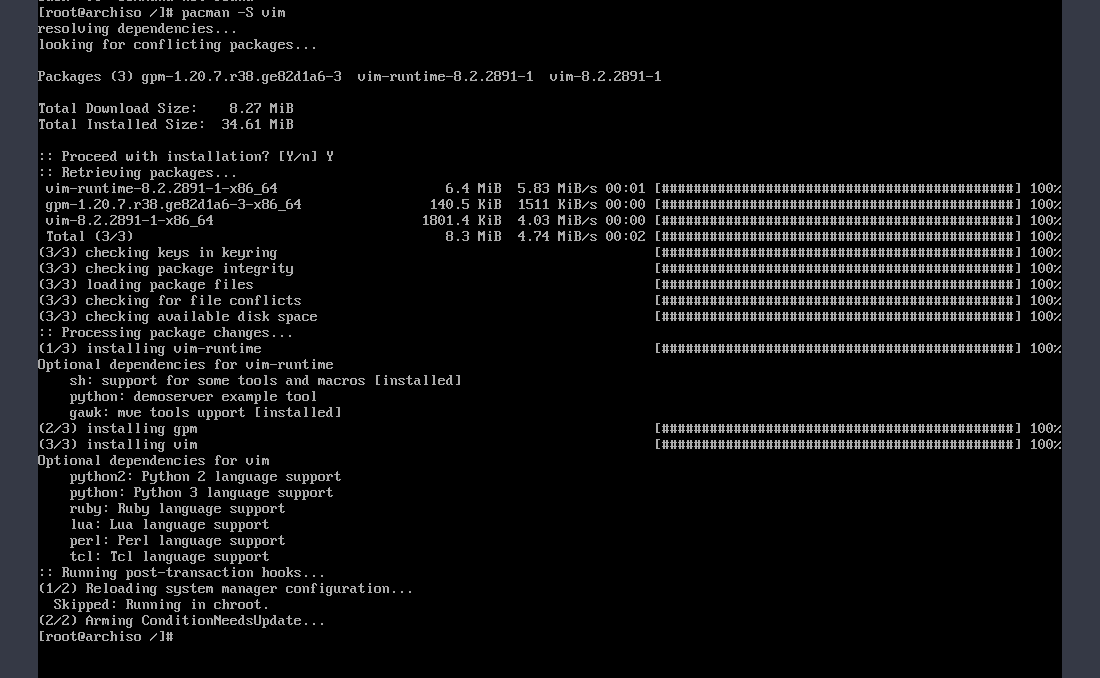
- The locale.gen file contains all the available locales. Just open it with your favorite editor and start editing. But before that, you need to install your editor. I will go with vim you can go with any editor you want. Vim will not come preinstalled because it is not part of the base package. So we need to run:
pacman -S vim
- pacman is the package manager of arch
- -S flag we are using sync the packages.
after that we will do:
vim /etc/locale.gen
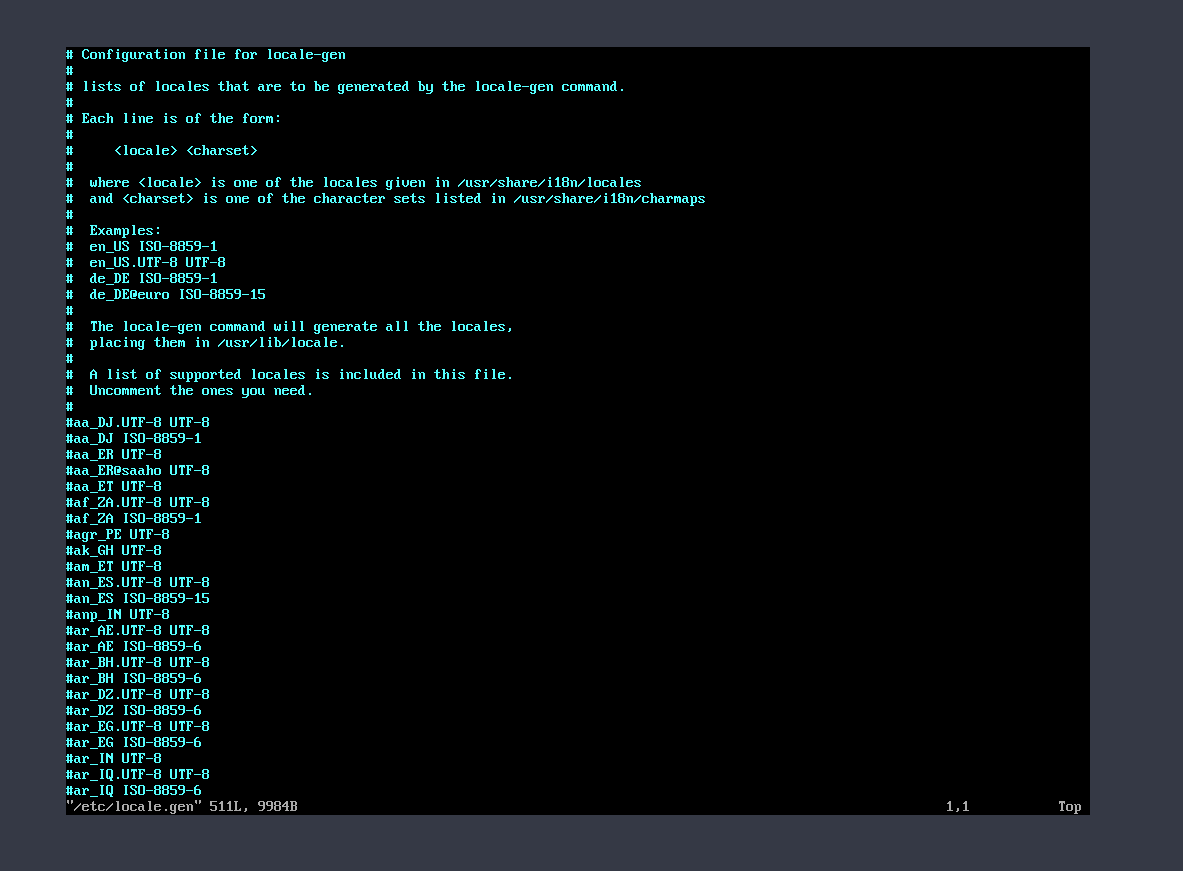
the file will look something like this.
- And after that go down and uncomment your locale for us region it will look like this.
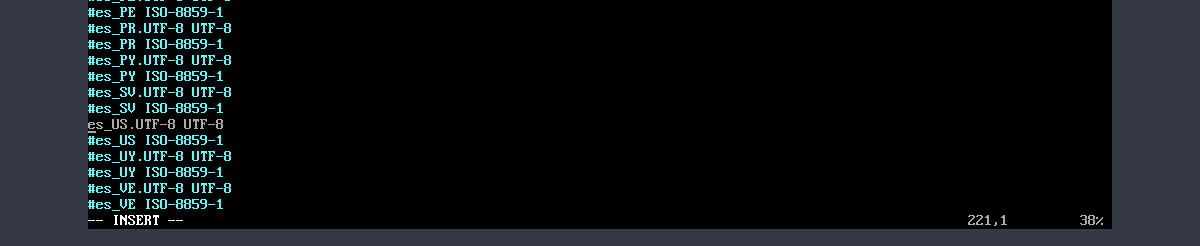
Uncomment and save the file.
- Then you have to generate the locale after editing locale.gen run this command:
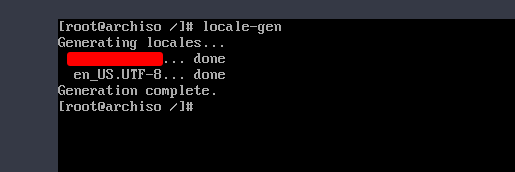
and yea you can uncomment more than one locale.
Setting the hostname
- Now we need to set the hostname, for that we need to make a hostname file in etc dir.
vim /etc/hostname
- Type the hostname and save:

- Now we need to Create the hosts file, In the same /etc dir named hosts.
vim /etc/hosts
It will not be empty there will be two commented lines just what you have to do copy the following lines from here or you can copy it from here Or just copy the below lines they are the same:
127.0.0.1        localhost
::1              localhost
127.0.1.1        _myhostname_._localdomain_        _myhostname_
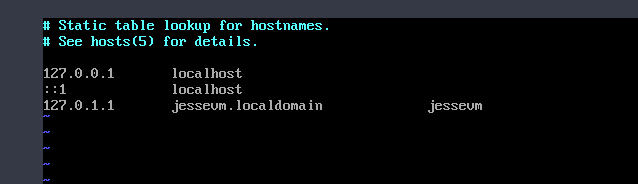 my /etc/hosts file.
Setting Root Password.
passwd
Now change the password, you know how to do it right? I am not going to tell this ;)
Adding New User
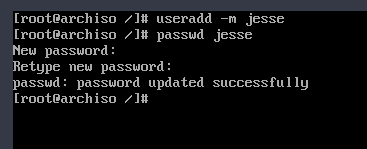
To add a user you need to use useradd command.
useradd -m jesse
-
Add the user and change the password.
-
Now Adding Jesse(user) to the wheel group(can use sudo) and some more important groups.
For this user need to use usermod command.
usermod -aG wheel,audio,video,optical,storage jesse(your user)

- Install Sudo
pacman -S sudo - Edit sudoers file using visudo. We need to use our editor of choice to edit the sudoers file if we use visudo it will edit it in vi and If you want to change it you can do.
EDITOR=vim visudo
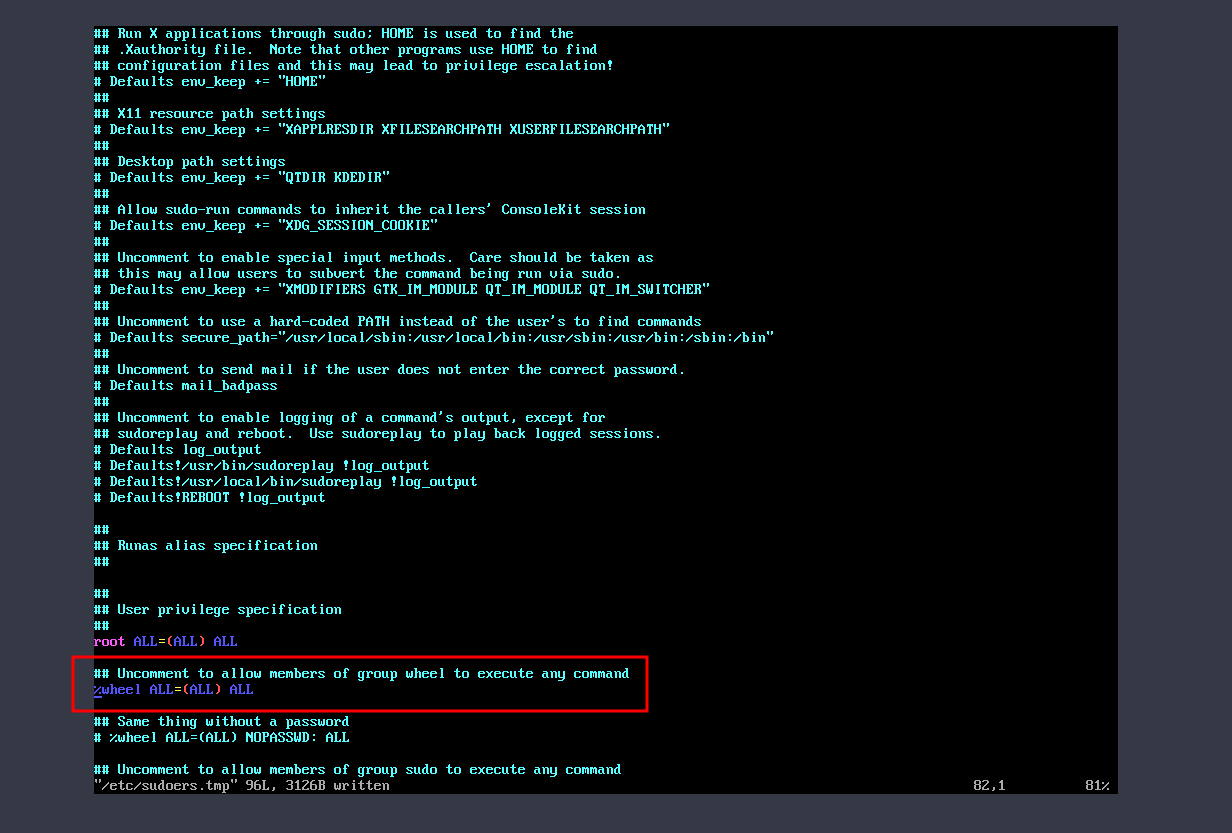
We editing the sudoers file to give your user permission that it can use the wheel group.
visudo
Run this and uncomment this line in the file -> %wheel ALL=(ALL) ALL
you can see in the image:
Now we have Configured Arch Successfully. Congrats
Installing Grub(bootloader)
- We can simple use pacman to install grub.
pacman -S grub - But there is something we need to install here.
pacman -S efibootmgr dosfstools os-prober

- Now we need to make EFI directory in the boot directory.
mkdir /boot/EFI - Now we need to mount the EFI partition to /boot/EFI so run.
mount /dev/sda1 /boot/EFI
- Now we need to install grub properly because pacman installed grub but it don’t know where to put grub so run.
grub-install --target=x86_64-efi --bootloader -id=grub_efi --recheck
And if the installation went successful it will show no errors.

- Now we need to make a grub config file run.
grub-mkconfig -o /boot/grub/grub.cfgIt generates the grub config file.
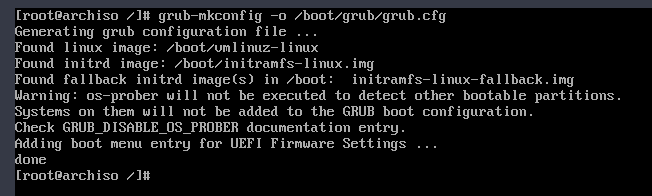
Yo we installed grub ;)
Last Steps(to install base arch)
So we will install a network manager and git before rebooting the machine. So run this command
pacman -S networkmanager git
- Enable network manager with systemd
systemctl enable NetworkManager
It’s enabled..

Exit Chroot Env and Reboot(shutdown for vm users)
First some steps before shutdown or rebooting.
- Unmount..
umount -l /mnt
we have unmounted.

- Now Shutdown VM users.
shutdown now -
Remove the arch iso from vm setting storage.
-
Now start the VM.
-
We got out little login panel

-
Let’s login as a User Jesse.
- Let’s check if Networking is available or not.
 We have the networking…
Hell yea we have installed arch now you are also a cool arch user trust me you can flex this
NOW THIS IS THE END OF THE FIRST PHASE WE LETS START THE SECOND PHASE
PHASE 2 -> Window Manager(Making arch GUI)
- Note: From here I’m installing a window manager that you don’t like or something from here you have zillions of choices consider arch wiki and go for your fav stuff.
Installing Utilities.
- First of all, do a system update using this command this will update the mirror list to the latest and some other stuff too.
sudo pacman -Syyu - Now we will install some utils like video drivers,terminal emulator,xorg, etc.Run this command.
sudo pacman -S xf86-video-fbdev xorg-xinit xorg nitrogen alacritty firefox picomSo let’s see what are we installing here:
- xf86-video-fbdev –> It’s the video driver for virtualbox
- xorg-xinit –> It manually starts the X server but you have to setup some login manager that I’m not going to install in here you can go to the internet and see there are many resources available on how to install a login manager.
- xorg –> It’s basically a display server.
- alacritty –> Our terminal emulator you can install of your choice.
- firefox –> Browser
- picom –> picom is a standalone compositor for Xorg, suitable for use with window managers that do not provide compositing.

- Let’s Install Windows manager. We will install our win manager using AUR. So Let’s Install Yay first use this command:
sudo git clone https://aur.archlinux.org/yay-git.git
- So it will clone the yay-git in the home folder and if you ls inside it you will find an arch package we need to make that package using make but before we need to install a meta-package called base-devel.Run:
sudo pacman -S base-devel
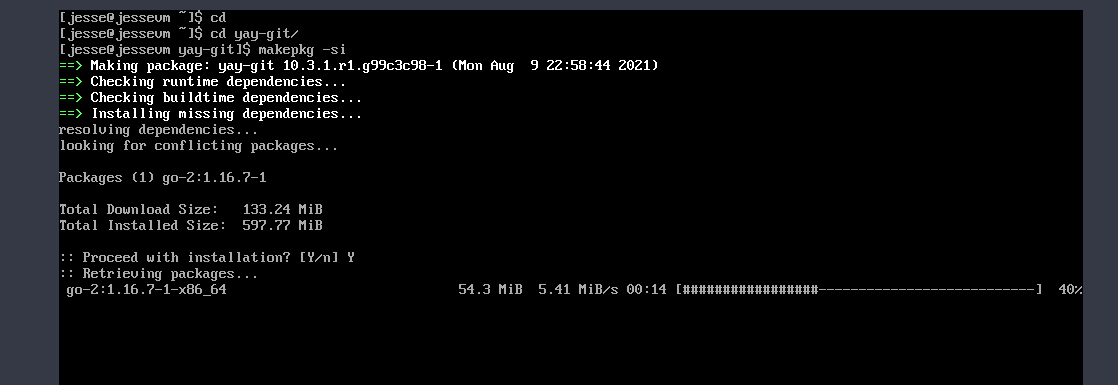
- After that, we will go to the yay-git dir and use the following command to build the package:
makepkg -siAnd it will install yay.
-
So now we need to install windows manager I will go with the patched dwm because if you install dwm win manager raw you will need to patch it so what I will do is I will go with a distrotube(youtube) his dwm patched dwm package.
-
Now let’s install distrotube-dwm we need to add his repo to our arch So let’s go and do it :)
-
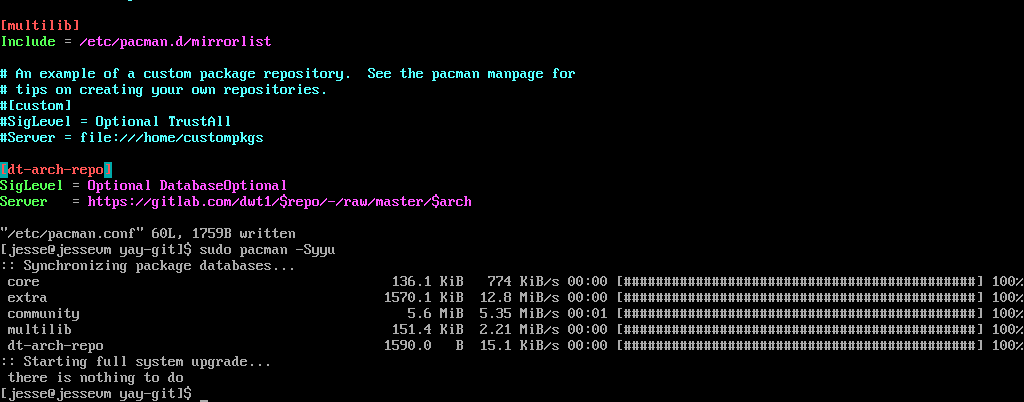
Just add the following lines to the end of /etc/pacman.conf : But before that, we need to enable multilib in the same just uncomment multilib in pacman.conf see like the below image.

[dt-arch-repo]
SigLevel = Optional DatabaseOptional
Server = https://gitlab.com/dwt1/$repo/-/raw/master/$arch
It will look like this and after that update using sudo pacman -Syyu
- Now Let’s finally install dwm and want to tell you yay works almost same as pacman with a wide range of software.
yay -S dwm-distrotube-git dmenu-distrotube-git nerd-fonts-mononoki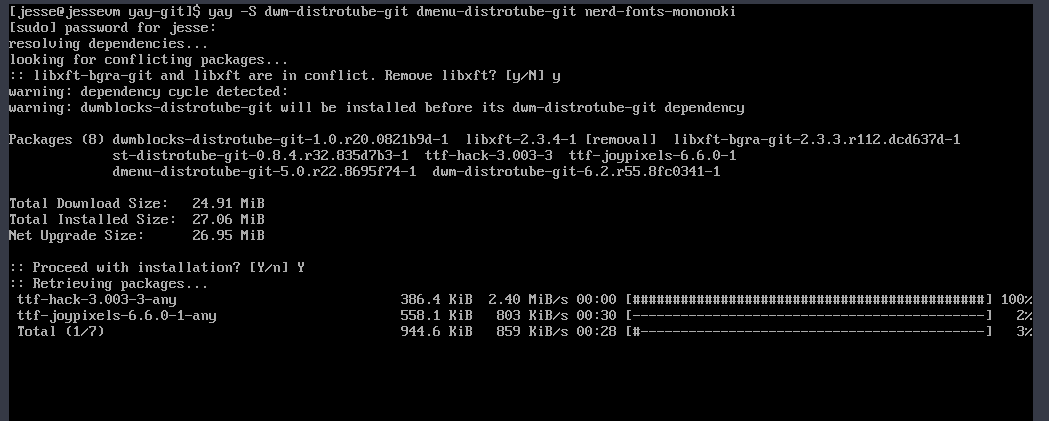
So let’s see what’s we are installing:
- dwm-distrotube-git –> so it’s just the patched version of dwm win manager you if you want raw you can install it but I will go with the patched one.
- dmenu-distrotube-git –> heavily-patched and customized build of the Suckless dmenu run launcher. But what dmenu? dmenu is a dynamic menu for X, originally designed for dwm. It manages large numbers of user-defined menu items efficiently. It is a very powerful tool that allows you to pipe information into it. This makes dmenu a perfect utility to incorporate into your scripting.
-
nerd-fonts-mononoki –> So this is a font that this dwm require if you installing this distrotube one then you need to install this :).
- Now we need to copy xinitrc file from etc/X11/xinit
Run the following:
cp /etc/X11/xinit/xinitrc /home/jesse(your_username)/.xinitrc - Editing xinitrc file
To launch dwm we need to edit .xinitrc file because from default it start a builtin win manager called twm but we dont want that so we will remove the last 5 lines and add these here:
nitrogen --restore &
picom &
exec dwm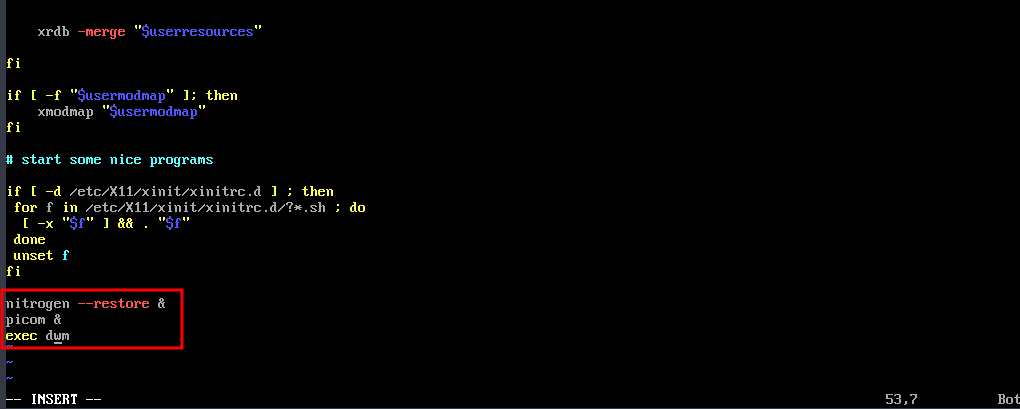
- Now we will restart the machine :))
NOTE: Login in as a user not root to run.
- Now after login as a user type startx and press enter.
startx
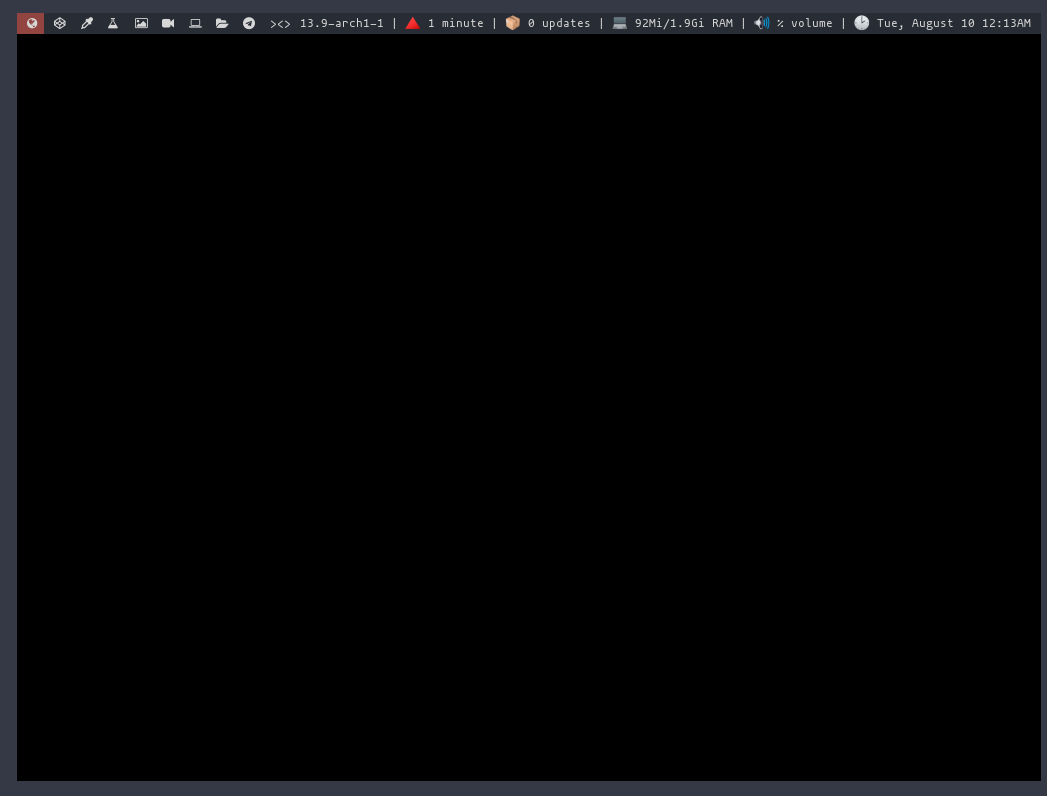 GUYS HURRAY!! WE MADE IT LOL FINALLY AFTER A VERY FREAKIN LONG ASS CLI SESSION WE MADE IT TO GUI
But we have another problem what are the key bindings so please go to the gitlab of distrotube and let me link the repo of dwm you can scroll down and see the keybinds in the key bind section Dwm-Keybinds just scroll down and you will find the key bind section.
LET MOVE TO THE LAST PHASE TURNING IT INTO A HACKING MACHINE
This is fairly easy and will take no time what we are gonna do here is take archstrike repo and merge it here that’s like having all the tools and any tool you want you can download
-
Let’s start:
- First use xrandr to make 1920x1080 reso:
xrandr -s 1920x1080 -
Now open your installed terminal emulator by opening dmenu using: Mod+Shift+Enter and name your terminal and open it.
-
Using Mod+Space you can full screen it.
- Now let’s make it hacking ready.
1. Setup the master ArchStrike repository mirror.
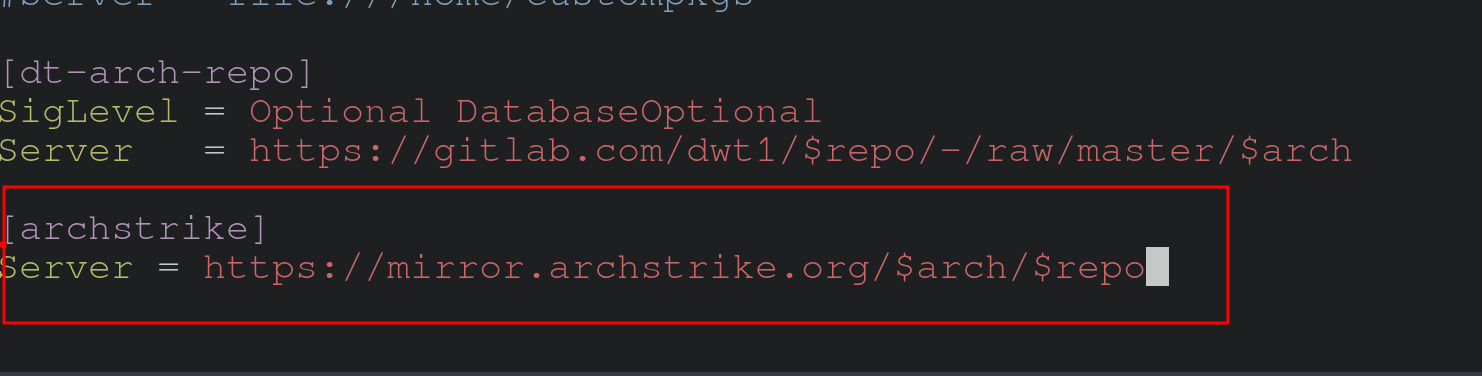
Add the following to the bottom of your /etc/pacman.conf:
[archstrike]
Server = https://mirror.archstrike.org/$arch/$repo
Refresh the pacman package database by running:
# pacman -Syy
2. Bootstrap and install the ArchStrike keyring.
Receive from keyserver
Initialize the pacman keyring and start dirmngr, then import and sign the key used to sign the archstrike-keyring package:
# pacman-key --init
# dirmngr < /dev/null
# pacman-key -r 9D5F1C051D146843CDA4858BDE64825E7CBC0D51
# pacman-key --lsign-key 9D5F1C051D146843CDA4858BDE64825E7CBC0D51
3. Install required packages
Install archstrike-keyring and archstrike-mirrorlist to import the keyring and setup the mirrorlist:
# pacman -S archstrike-keyring
# pacman -S archstrike-mirrorlist
4. Configure pacman to use the mirrorlist
Open /etc/pacman.conf and replace the following block you added above:
[archstrike]
Server = https://mirror.archstrike.org/$arch/$repo
with a new block that uses the mirrorlist instead:
[archstrike]
Include = /etc/pacman.d/archstrike-mirrorlist
Refresh the pacman package database again to reflect the changes above by running:
# pacman -Syy
In the final the pacman.conf archstrike block should look like this:

- You can list all the packages of archstrike with this command.
pacman -Sl archstrike
So guys it’s done xD damn son it was long
Kudos to you want just want to say just try to install in vbox and you will gonna love it :)
Bonus Section
Skip startx in the starting
- So I know that you all are lazy af so let’s skip the startx thing.
Open .bash_profile
and type this line.
exec startx -- vt1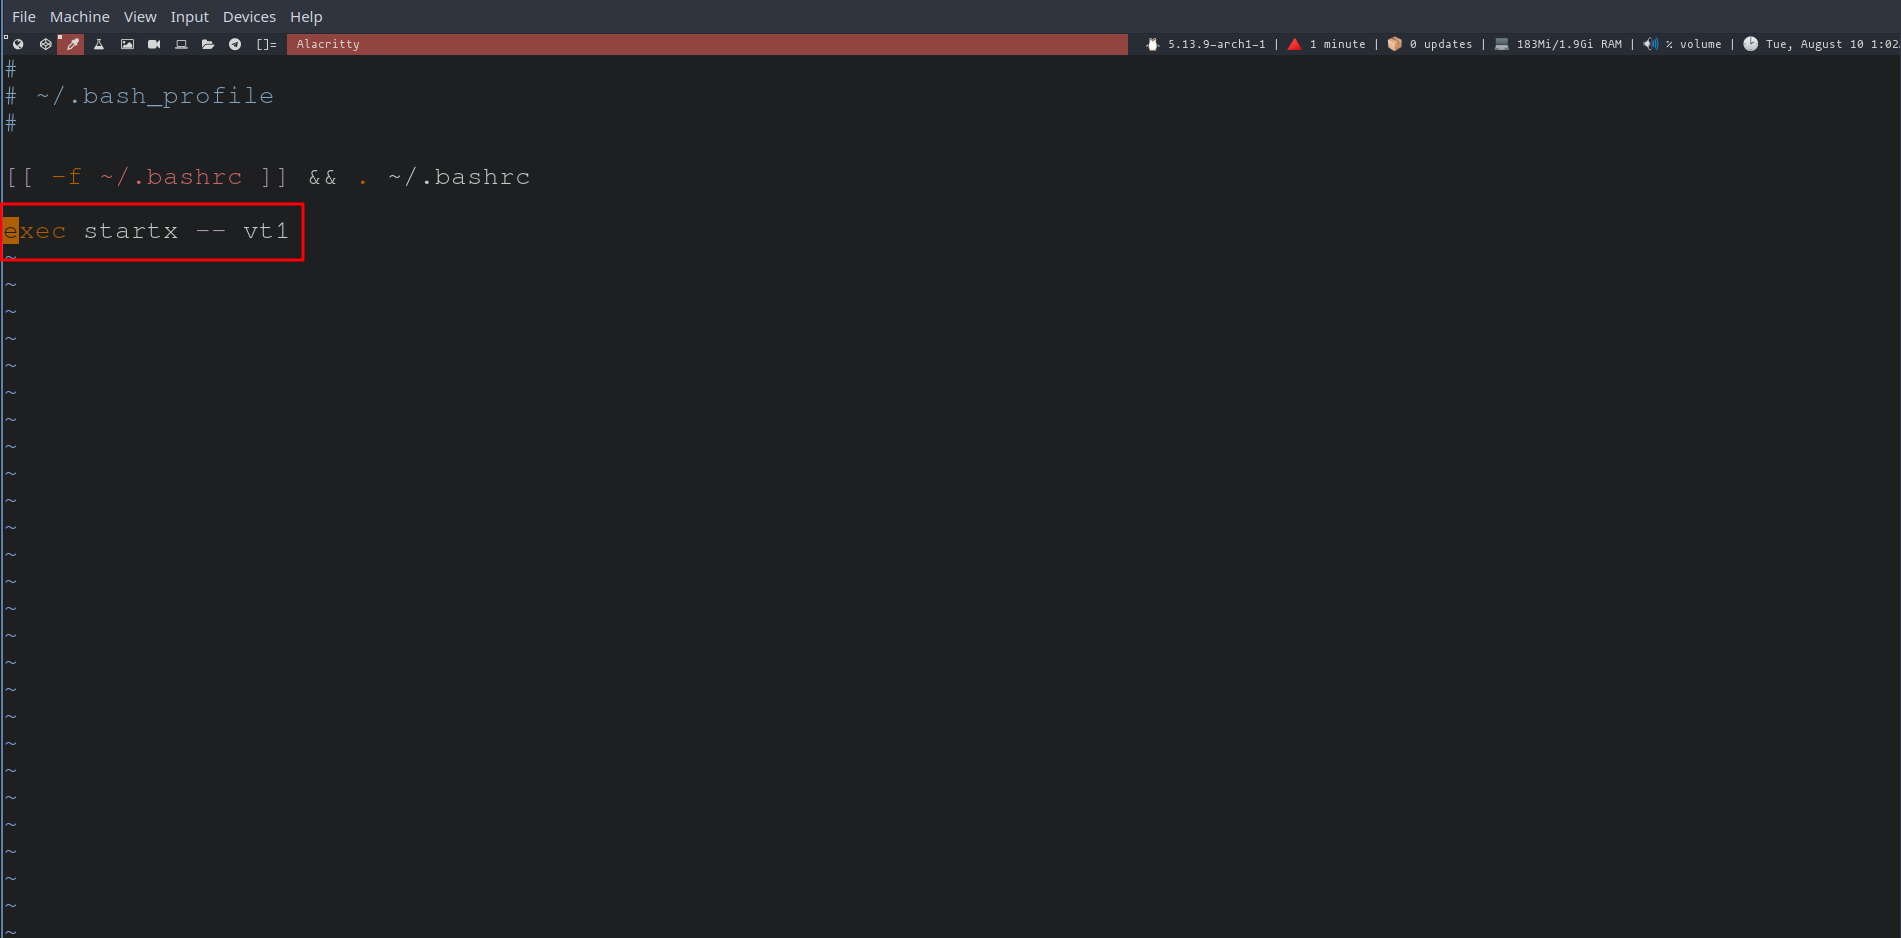
And Yea I want to close this here and if you face some problem do message me on Twitter this is my Twitter r00tkit__